CodeShell
CodeShell-7B-Chat 模型下载
魔搭社区就有这个模型,很方便。这里将模型放到了:
git lfs install
git clone https://modelscope.cn/WisdomShell/CodeShell-7B-Chat.git
CPU部署
这里先测试一下 CPU的推理方式:利用
llama cpp for codeshell
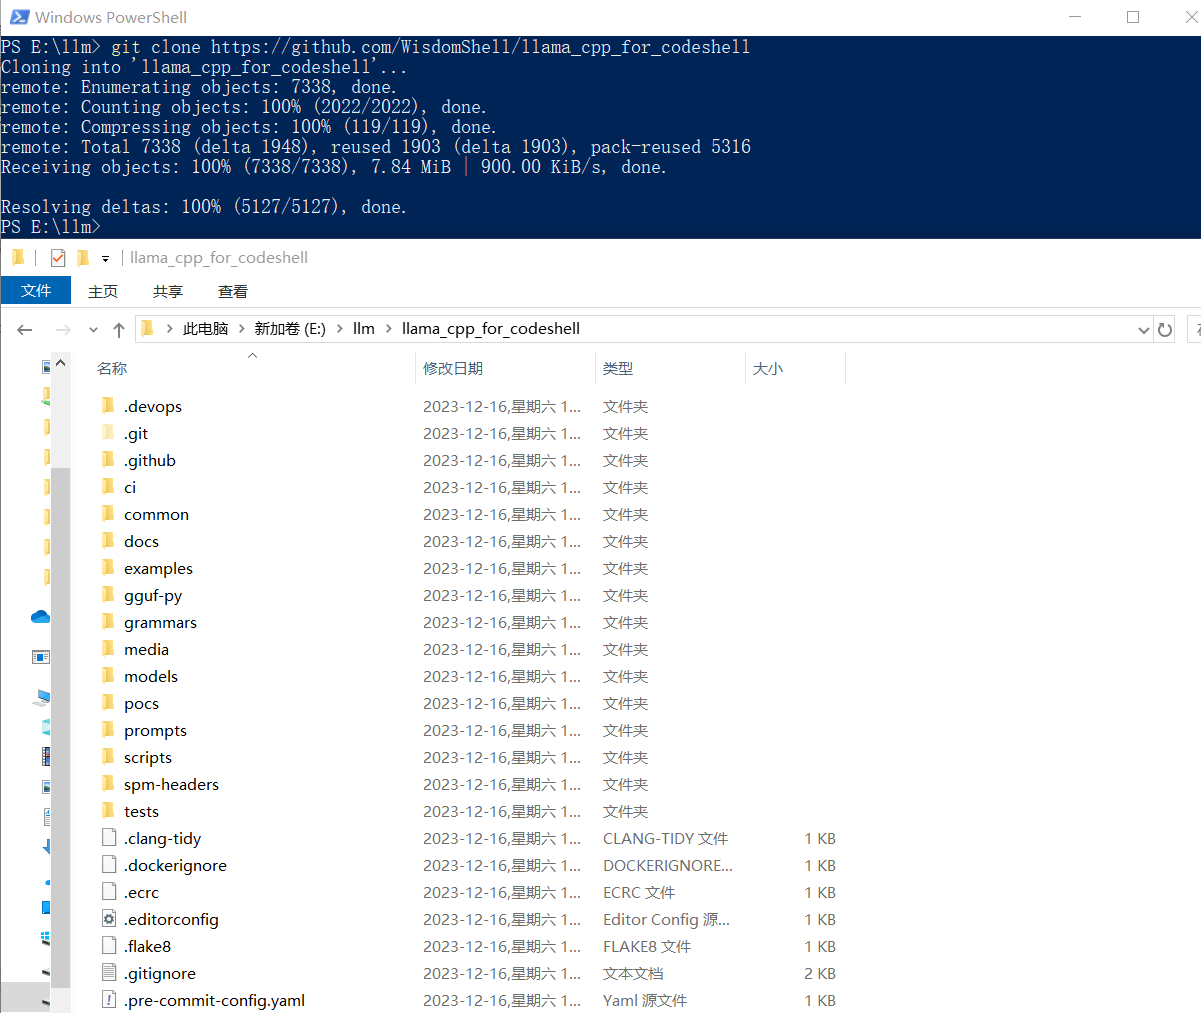
这是一个llama.cpp的Fork项目。项目地址为:GitHub - WisdomShell/llama_cpp_for_codeshell: CodeShell model in C/C++。这里将项目放到了
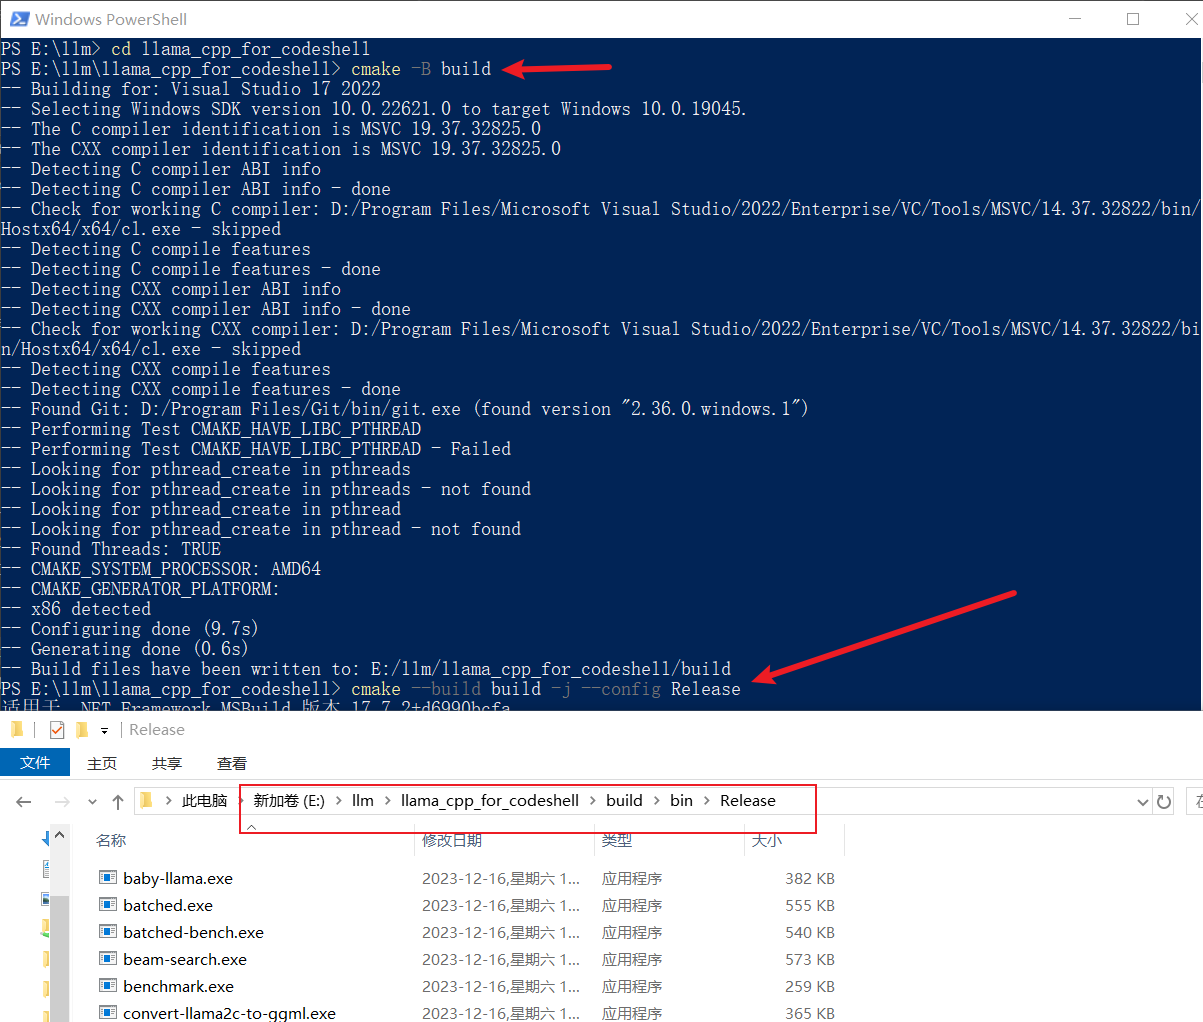
编译时参考llama.cpp - xiaodu114.github.io,如下图:
接着创建 Python虚拟环境、安装依赖并将模型权重转为GGUF
#   在这个目录:E:\llm\llama_cpp_for_codeshell
python -m venv venv
.\venv\scripts\activate
pip install -r requirements.txt
python convert.py D:\llm\WisdomShell\CodeShell-7B-Chat
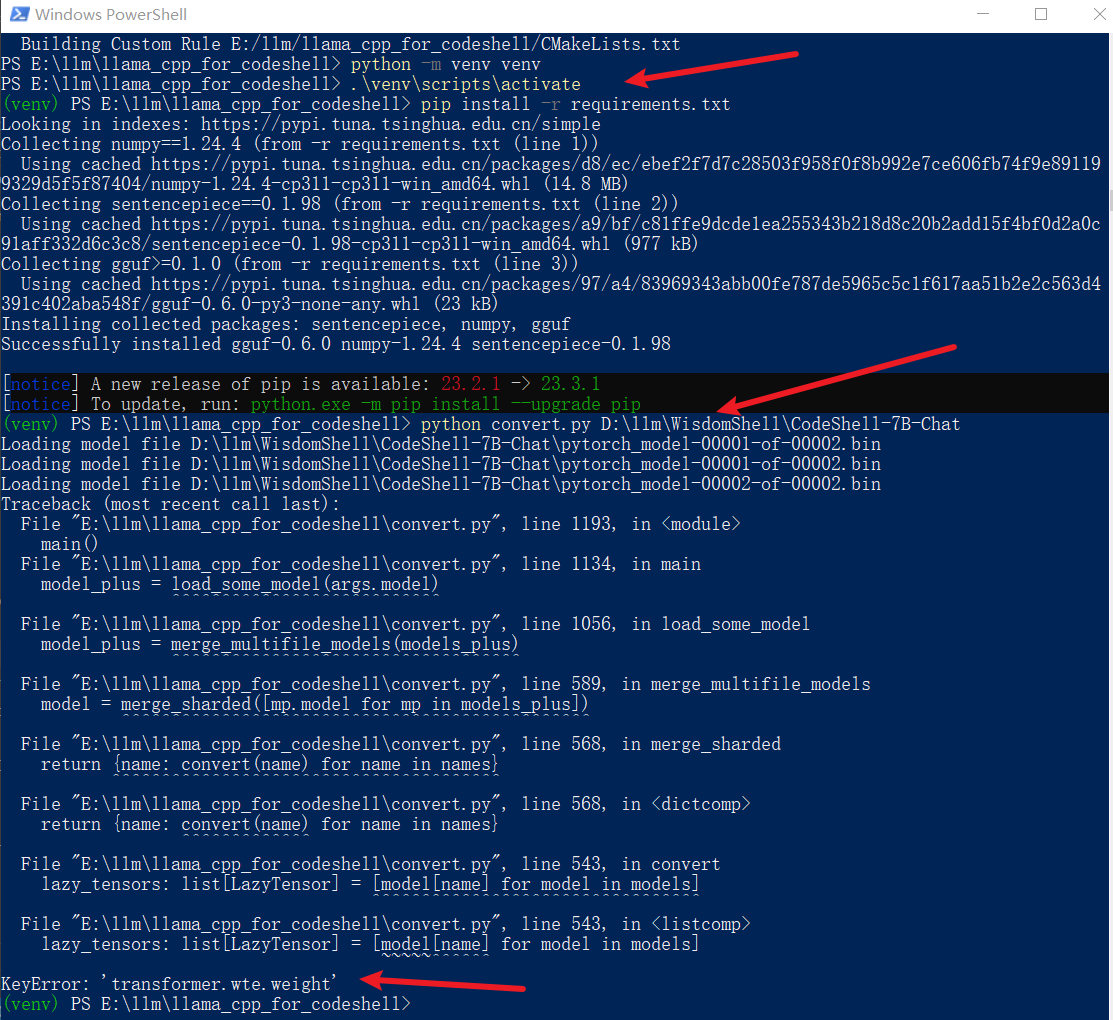
转换失败了,已经习惯了,是吧!这里没有去研究报错的原因,无意间发现了她……
直接下载GGUF
上面的方式失败之后,无意间在hf-mirror.com - Huggingface 镜像站搜索
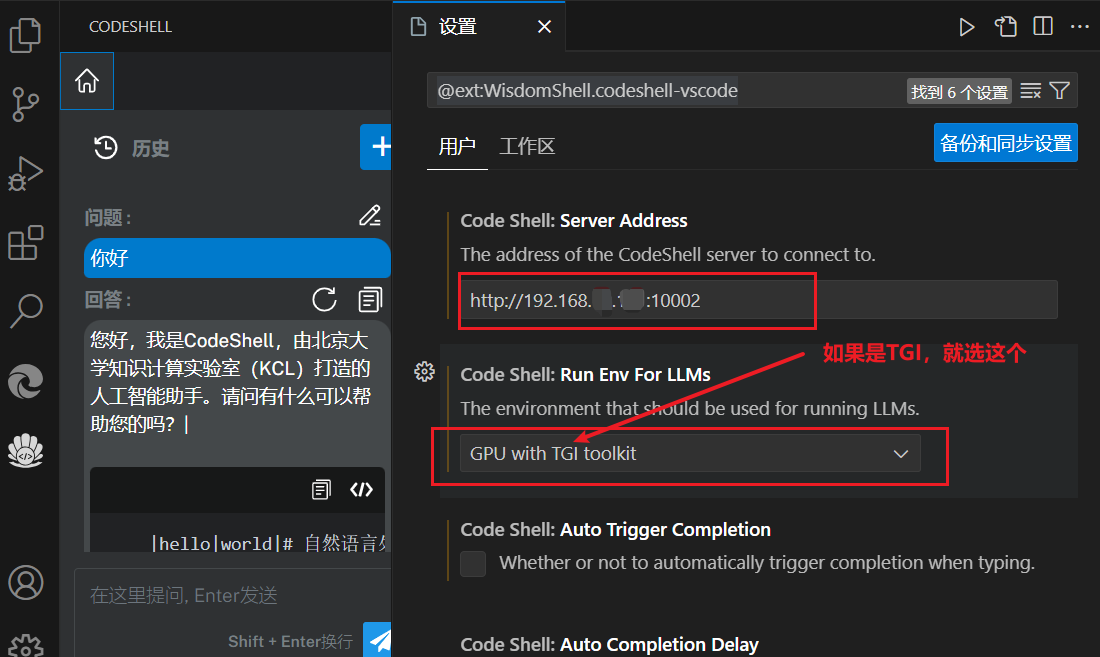
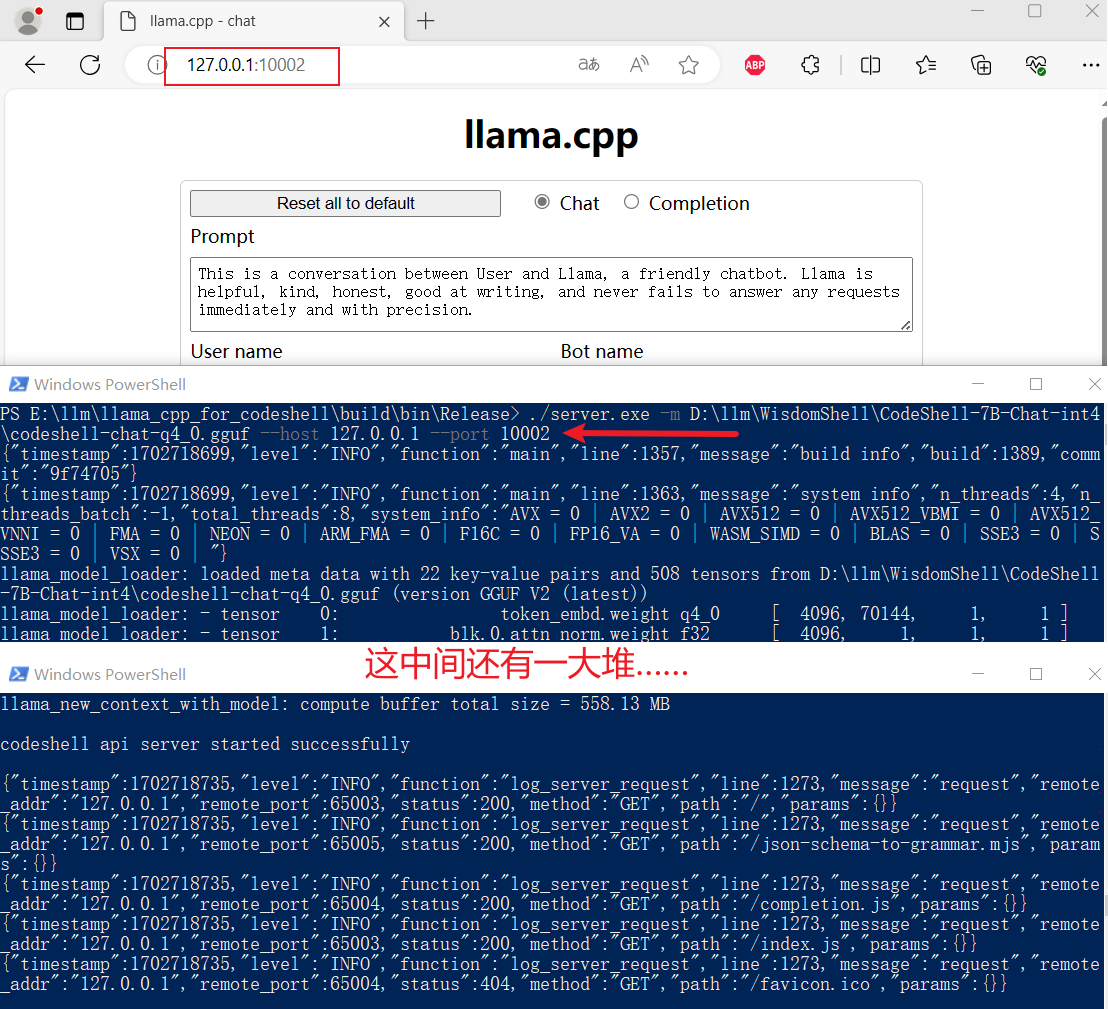
启动API
进入上面
./server.exe -m D:\llm\WisdomShell\CodeShell-7B-Chat-int4\codeshell-chat-q4_0.gguf --host 127.0.0.1 --port 10002
TGI
纯血版TGI:GitHub - huggingface/text-generation-inference
官方接口文档:Text Generation Inference API
WisdomShell版:GitHub - WisdomShell/text-generation-inference
这个项目简直了,部署实在是太曲折了,怪不得官网建议使用
参考文章:vllm vs TGI 部署 llama v2 7B 踩坑笔记、主流推理框架哪家强?看看它们在Llama 2上的性能比较
Rust
安装
安装其他依赖
#   gcc版本检测
gcc --version
#   安装依赖
sudo apt install libssl-dev gcc pkg-config unzip
protoc
这个可以先去GitHub - protocolbuffers/protobuf: Protocol Buffers - Google's data interchange format。这里下载的是
#   在文件 protoc-25.1-linux-x86_64.zip 的目录进入终端
sudo unzip -o protoc-25.1-linux-x86_64.zip -d /usr/local bin/protoc
sudo unzip -o protoc-25.1-linux-x86_64.zip -d /usr/local 'include/*'
源码修改
自己对
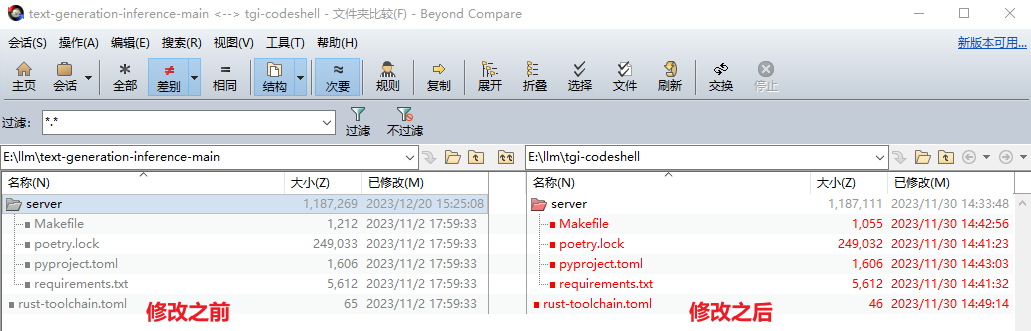
server\Makefile
这里删除了

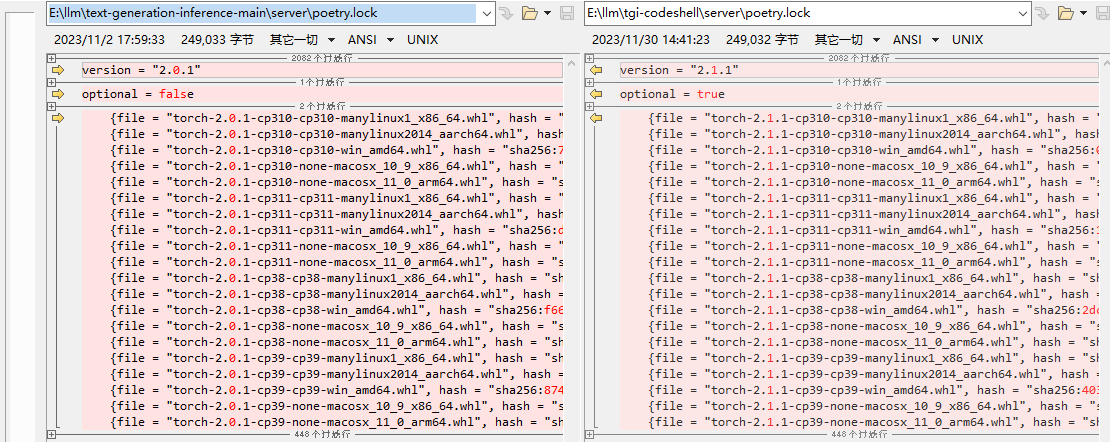
server\poetry.lock
这个应该算是
server\pyproject.toml
这个也是

server\requirements.txt
这个也是

\rust-toolchain.tom
这里指定的

创建虚拟环境
python3 -m venv venv
source ./venv/bin/activate
执行make命令
#   在上面激活的虚拟环境中执行
BUILD_EXTENSIONS=True make install
经过上面的修改,应该可以编译成功了。可以使用下面的命令检测一下:
text-generation-launcher --help
点击查看 text-generation-launcher --help 输出
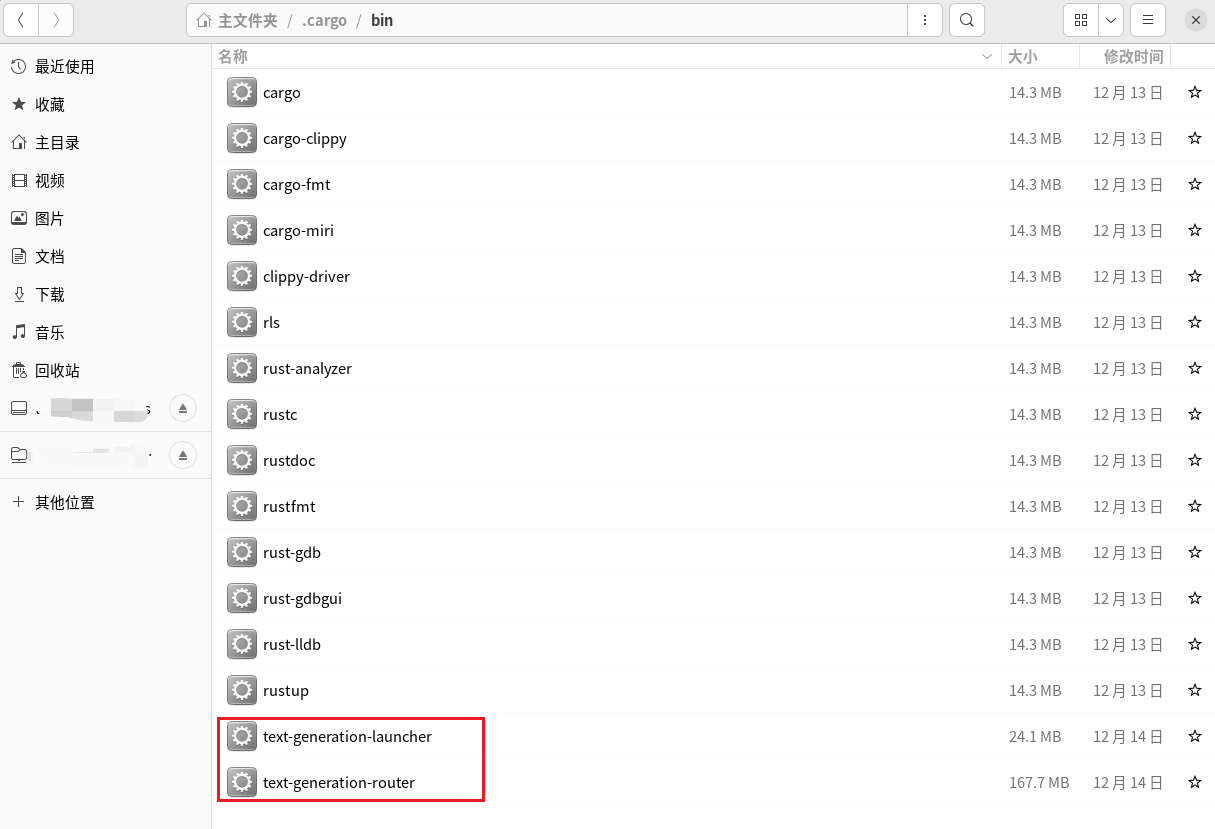
编译成功之后还会
启动API
项目目录启动
#   tgi-codeshell目录打开终端

#   进入虚拟环境
source ./venv/bin/activate

#   启动    注意:替换自己的模型权重路径、IP地址、端口等
#   如果是多显卡,需要 CUDA_VISIBLE_DEVICES 和 num-shard 配合使用。
#       CUDA_VISIBLE_DEVICES=0 #第1块显卡   CUDA_VISIBLE_DEVICES=1 #第2块显卡   CUDA_VISIBLE_DEVICES=0,1 #第1、2块显卡
#       num-shard 感觉像是使用的显卡的块数
CUDA_VISIBLE_DEVICES=1 text-generation-launcher \
--model-id /llm/0-model/WisdomShell/CodeShell-7B-Chat \
--hostname 192.168.xxx.xxx -p 10002 \
--num-shard 1 \
--max-total-tokens 5000 --max-input-length 4096 \
--max-stop-sequences 12 \
--trust-remote-code
sh脚本启动
每次进入项目、打开终端、激活虚拟环境、启动,太繁琐了。弄一个sh脚本,“双击”启动,多爽。脚本内容如下:
#!/bin/bash

# 打开一个新的终端,并在指定目录进入虚拟环境venv
gnome-terminal --working-directory=/llm/2-code/tgi-codeshell -- /bin/bash -c 'source ./venv/bin/activate;
CUDA_VISIBLE_DEVICES=1 /home/xxx/.cargo/bin/text-generation-launcher \
--model-id /llm/0-model/WisdomShell/CodeShell-7B-Chat \
--hostname 192.168.xxx.xxx -p 10002 \
--num-shard 1 \
--max-total-tokens 5000 --max-input-length 4096 \
--max-stop-sequences 12 \
--trust-remote-code;
exec /bin/bash'

exit
-
sh脚本启动,目前还有问题,根据错误提示,搜索项目找到
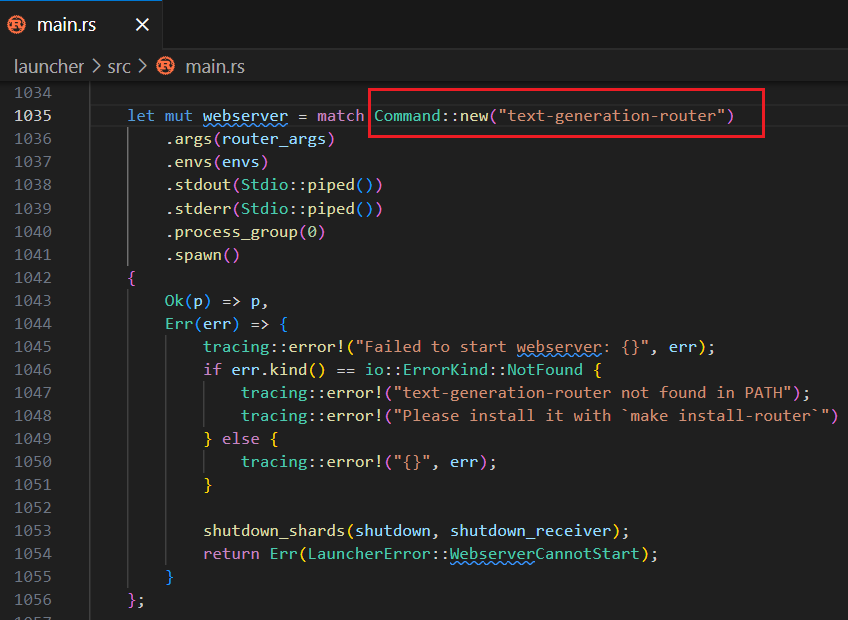
根据代码发现,应该是这里的问题:
Command::new("text-generation-router") 。不知道这里替换成绝对路径行不行,还没有来得及测试 - sh脚本好像不能访问
$PATH 中的命令,所以上面text-generation-launcher 使用的是绝对路径
CodeShell VSCode Extension
项目地址:GitHub - WisdomShell/codeshell-vscode
怎么安装插件咱就不说了
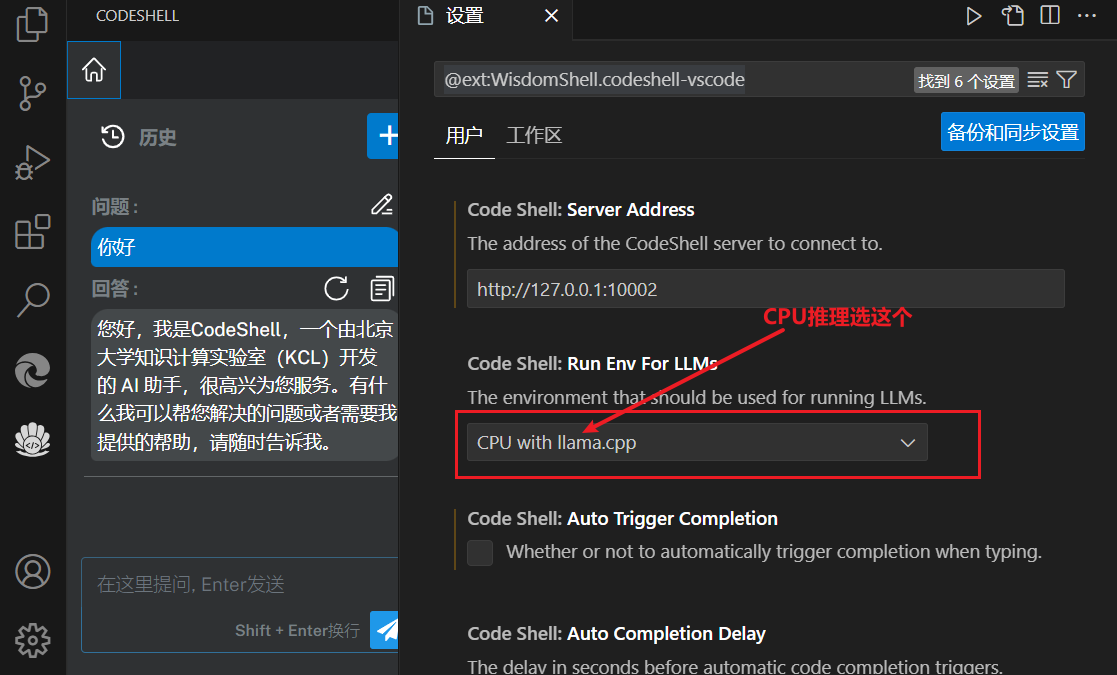
CPU推理对应配置
TGI对应配置